


Double Premium Powered BBQ Rotisserie Kit
Description
Description
2 x 3pcs Standard Box Sets – Double the Flavour. Double the Value.
Why stop at one?
The Double Premium Powered BBQ Rotisserie Kit includes 2 complete Standard Box Sets, giving you the flexibility to enjoy one yourself while keeping another for someone special.
Keep one for your own braai and surprise your best friend, family member, or fellow braai enthusiast with the second kit. It's also the perfect choice for your holiday home, camping setup, or simply having a spare ready whenever friends come over.
Whether you're cooking juicy picanha, chicken, ribs, lamb, brisket or fish, our powered rotisserie delivers perfectly even cooking over charcoal or wood with minimal effort.
Manufactured in Brazil from premium 304 stainless steel, each complete kit is lightweight, cordless and compatible with most braais, BBQs, grills, kettles, kamados and drums up to 620mm wide.
Need extra length? Our 200mm centre rod extension is available separately for braais up to 800mm.
Why You'll Love It
- Includes 2 x 3pcs complete Standard Box Sets
- Keep one and gift one to your best friend or family member
- Great value compared to buying separately
- Perfect for couples, families, camping and holiday homes
- Fits most braais, BBQs, grills, kettles, kamados and drums up to 620mm
- Premium 304 stainless steel construction
- Each skewer supports up to 5kg of meat
- Runs up to 50 hours on 4 AA alkaline batteries (approximately 20 hours on regular batteries)
- Compatible with rechargeable AA batteries
- Lightweight, portable and completely cordless
Package Includes
2 x 3 pcs complete Standard Box Sets, consisting of:
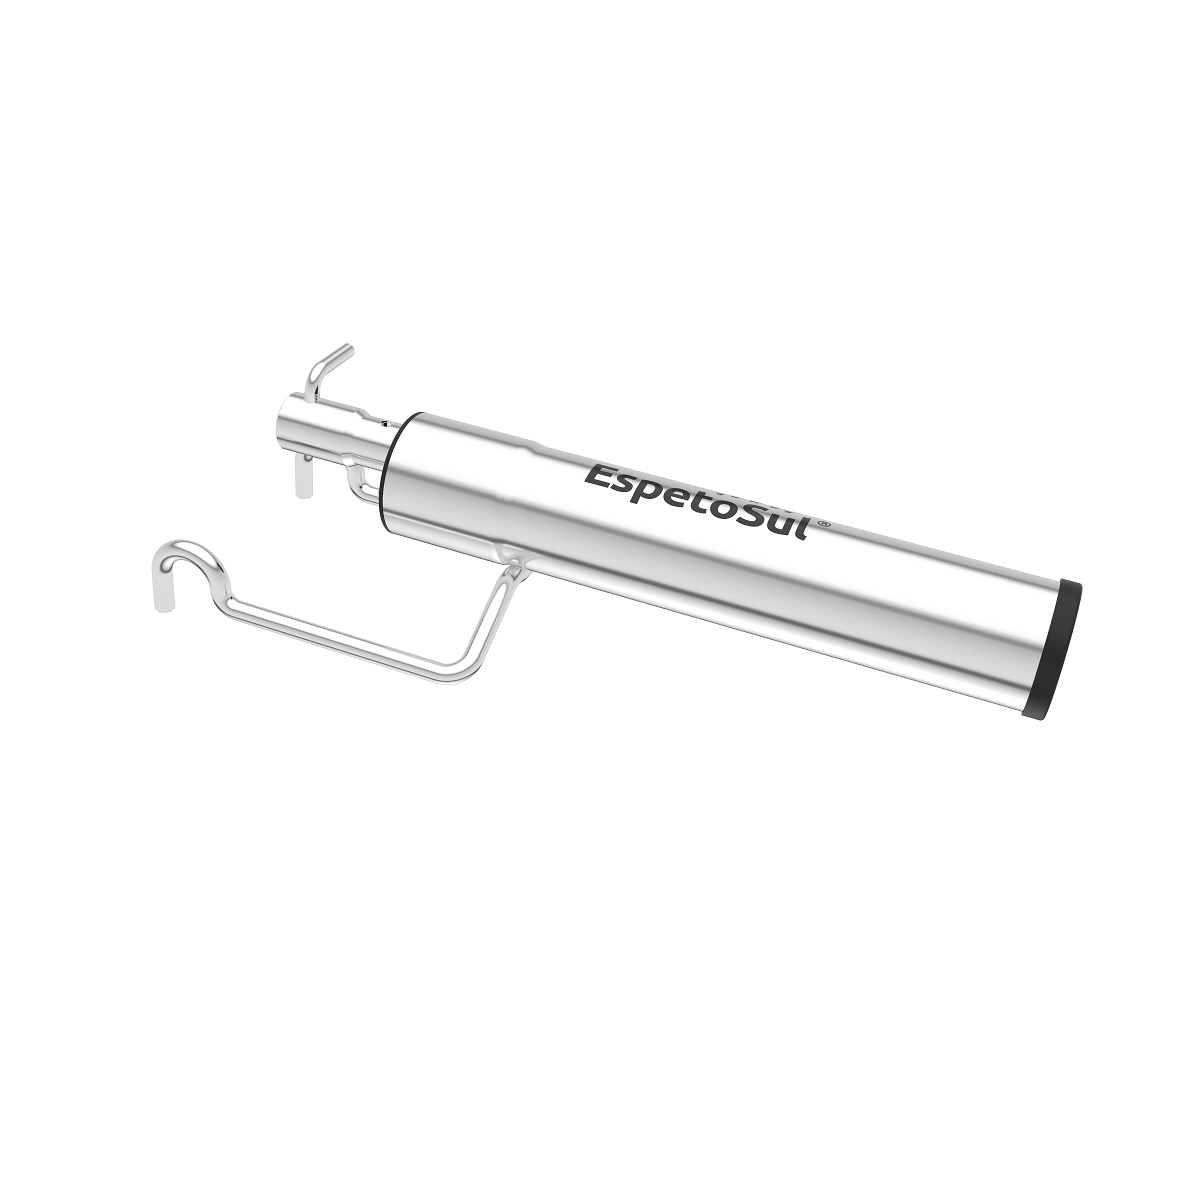
- 2 × Motorised stainless steel handle grips
- 2 × 620mm stainless steel centre rods
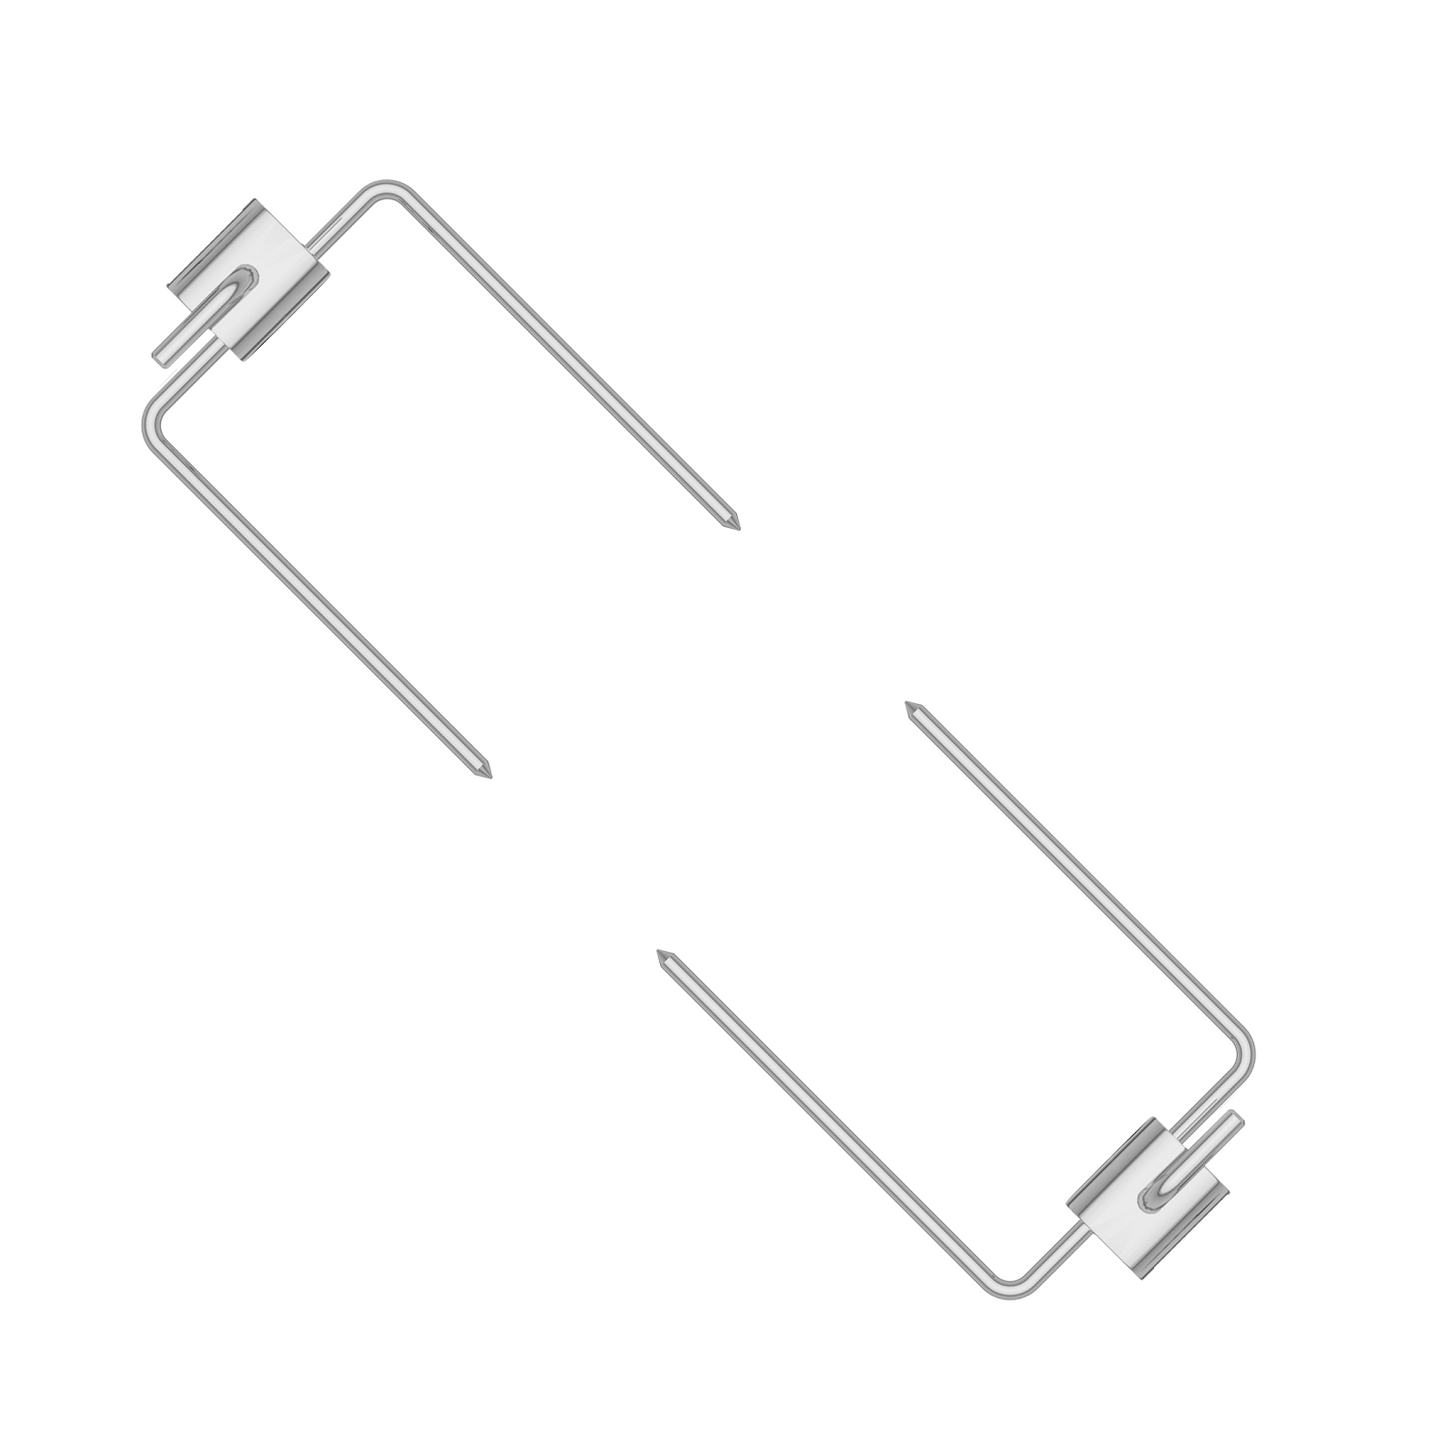
- 2 × 340mm stainless steel meat claws
The Perfect Bundle
Whether you keep both kits for yourself or share one with someone who loves a great braai as much as you do, this bundle offers exceptional value and endless opportunities to create unforgettable meals over the fire.
One for you. One for your best friend or family. Because great braais are even better when they're shared. 🔥
Reviews
Reviews
Warranty
Warranty
Every EspetoSul Rotisserie is now backed by a comprehensive three-year warranty, giving you complete confidence in your purchase. Crafted from premium stainless steel and engineered for performance, each unit is built to deliver exceptional results and lasting durability — season after season.



Check compatibility
Jump to: Built-In Braai Installation Guide
See the most common Braai's below to see if EspetoSul Rotisserie will work with yours.
| Brand | BBQ | Size | Rotisserie | Extension | Basket | Carrousel | Notes |
| Weber | Q2000 & Q3000 | 63 x 45cm | ✓ | ✓ | ✓ | ✓ | Standard 3 Piece Kit suits 45cm length. Use the extension rod (included in 4, 5 or 6 Piece Kit) for the 63cm width. |
| Weber | Smokey Joe | 14" | ✓ | X | X | X | |
| Weber | Jumbo Joe | 18" | ✓ | X | ✓ | ✓ | |
| Weber | Smokey Mountain | 14" | ✓ | X | X | X | |
| Weber | Smokey Mountain | 18" | ✓ | X | ✓ | ✓ | |
| Weber | Smokey Mountain | 22" | ✓ | X | ✓ | ✓ | |
| Weber | Original Kettle | 18" | ✓ | X | ✓ | ✓ | |
| Weber | Original Kettle | 22" | ✓ | X | ✓ | ✓ | |
| Weber | Original Kettle | 22" | ✓ | X | ✓ | ✓ | |
| Weber | Original Kettle | 26" | ✓ | ✓ | ✓ | ✓ |
Needs extension or long central rod
|
| Weber | Master Touch | 22" | ✓ | X | ✓ | ✓ | |
| Weber | Performer | 22" | ✓ | X | ✓ | ✓ | |
| Weber | Performer Premium | 22" | ✓ | X | ✓ | ✓ | |
| Weber | Summit Kamado | 24" | ✓ | ✓ | ✓ | ✓ |
Needs extension or long central rod & 24" Rack
|
| Weber | Summit Kamado | 24" | ✓ | ✓ | ✓ | ✓ |
Needs extension or long central rod & 24" Rack
|
| Kamado Joe | Kettle Joe | 22" | ✓ | X | ✓ | ✓ | Needs 22" Rack |
| Kamado Joe | Joe Jnr | 13.5" | ✓ | X | X | X | Needs 18" Rack |
| Kamado Joe | Classic Joe Series I | 18" | ✓ | X | ✓ | ✓ | Needs 18" Rack |
| Kamado Joe | Classic Joe Series II | 18" | ✓ | X | ✓ | ✓ | Needs 18" Rack |
| Kamado Joe | Classic Joe Series III | 18" | ✓ | X | ✓ | ✓ | Needs 18" Rack |
| Kamado Joe | Classic Joe "standalone" Series II | 18" | ✓ | X | ✓ | ✓ | Needs 18" Rack |
| Kamado Joe | Classic Joe "standalone" Series III | 18" | ✓ | X | ✓ | ✓ | Needs 18" Rack |
| Kamado Joe | Big Joe "standalone" Series II | 24" | ✓ | X | ✓ | ✓ | Needs 24" Rack |
| Kamado Joe | Big Joe Series I | 24" | ✓ | ✓ | ✓ | ✓ | Needs extension or long central rod & 24" Rack |
| Kamado Joe | Big Joe Series II | 24" | ✓ | ✓ | ✓ | ✓ | Needs extension or long central rod & 24" Rack |
| Kamado Joe | Big Joe Series III | 24" | ✓ | ✓ | ✓ | ✓ | Needs extension or long central rod & 24" Rack |
| Kamado Joe | Pallet Joe | 18" | ✓ | X | ✓ | ✓ | Needs 18" Rack |
| Oklahoma Joe | Rambler | 17" x 13" | ✓ | X | X | X | |
| Oklahoma Joe | Blackjack | 21.5" | ✓ | X | ✓ | ✓ | |
| Oklahoma Joe | Bronco | 18" | ✓ | X | ✓ | ✓ | |
| Oklahoma Joe | Bronco Pro | 21.5" | ✓ | X | ✓ | ✓ |
Built-In Braai Installation Guide
Every built-in braai is different, so there is no single correct way to install the rotisserie.
The examples below are only intended as a guide. The installation method depends on your braai and your own support arrangement.
The only requirements are:
-
The skewer rod must be supported at two points, just like in the example below.
-
The rod must be able to rotate freely without touching the grill, braai walls or other obstructions.
-
The motor and handle must remain outside the braai and away from direct heat.

Once these three requirements are met, there are many ways to position the rotisserie.
Common installation methods
1. Across the braai- modified grill frame
The rod is supported at the back and at the front opening of the braai. An existing grill frame may also be used as the support structure. The centre section must remain open so the meat can rotate without touching the grid. The frame can be moved slightly forward if necessary.
The distance from the pointed end of the skewer rod to the retaining hook near the handle is approximately 57 cm. This does not mean the braai must be 57 cm deep. The rod can be positioned slightly forward, angled, or diagonally, provided the hook and both support points remain secure and the rod can rotate freely.


2. Slightly angled position
If required, the rod may be positioned at a slight upward angle, but the angle should not exceed 45°. A steeper angle can cause the meat’s weight to place additional strain on the motor and slow the rotisserie.
Ensure the rod is securely supported at both ends. The rear support must hold the rod firmly and prevent it from resting against the back wall of the braai, while still allowing it to rotate freely.
Be aware that fat may travel along the angled rod toward the motor handle. Wipe it away regularly or install a suitable heat-resistant drip guard to prevent fat from entering the motor. Do not place ordinary cloth near flames, hot surfaces, or moving components.

3. Diagonal Installation
Some built-in braais are shallower than others. In these cases, the skewer rod can be installed diagonally using a secure custom support or bracket at the front of the braai.
The custom front support should securely support the skewer rod or hook, preventing it from moving or slipping under the weight of the food. The opposite end of the skewer can rest on the existing grill support, rear hook, or another stable support point. The rear hook should retain the skewer and prevent the meat from sliding or shifting during rotation. As long as the main support closest to the motor/handle is secure, the skewer will remain safely in position.

Creativity Is Encouraged
Every built-in braai is unique, and many customers have successfully created their own support solutions.
Your support arrangement may use:
-
Existing grill supports
-
Steel brackets
-
Hooks or rails
-
Modified grill frames
-
Custom fabricated supports
There is no single "correct" design.
As long as:
-
both ends of the skewer are securely supported,
-
the support points cannot move or slip,
-
the rod rotates freely without obstruction,
-
the skewer remains securely retained during operation, and
-
the motor remains outside the braai and away from direct heat,
Golden Rule
✅ Two Secure Support Points
✅ Free Rotation
✅ Motor Outside the Heat
If these three conditions are met, your built-in braai is compatible.
Is your Braai model not included in the above list? Please contact us if you would like to confirm compatibility
Have a question?
Notified by email when this product becomes available

R 3,900.00


